There is a Chinese saying goes, The start of everything is the hardest. Since the start is already difficult, let’s keep it quite simple on our first day. We only need to install some software and type three lines of commands in the terminal. 🙂
It’s quite different from working with D3 than Power BI and Tableau. To set up the tool for building the visualizations, we will need a localhost. (There are different ways to set up; you can also use Python.)
Set up http-server
Step 1: Install Visual Studio Code and Node.js.
Step 2: in VS Code, click “New Terminal” under “Terminal“, then type the following commands:
npm --versionThis is to check npm package is installed. You will have it after installing Node.js.
npm install -g http-serverThis is to install the http-server globally on your machine.
http-serverIt will start a localhost server for the directory you currently have open in VS Code.
Step 3: Open your browser and type localhost:8080.
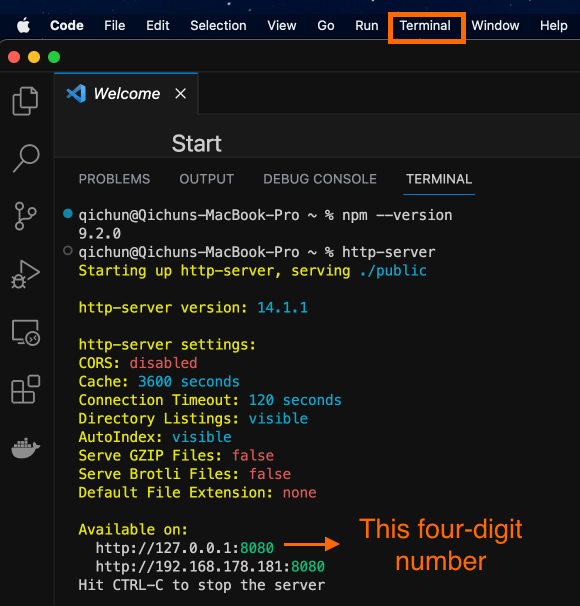
Your localhost number might not be 8080. Once you enter “localhost:8080” and it loads the folder directory, congrats on setting up the environment. Now, you can chill with a cup of coffee and feel satisfied that the first step has been taken.
Extra Setup
Auto Save in VS Code. Go to “File”, toggle on “Auto Save”. This will save you the effort of typing “control/command + S” many times.

Disable Cache in your browser. Right-click any page in your web browser and click “Inspect”. Under “Network”, toggle on “Disable Cache”.
If this is not toggled on, when you load your project and then make changes in your code, those changes won’t be reflected even after refreshing the page. I won’t even mention how long I spent debugging my code before realizing it wasn’t loading my changes. lol

Now we are all set to open webpages with our localhost!
